
You’re about to embark on a roof installation journey, and we’re here to guide you.
From assessing your current roof’s condition to choosing the right materials, you’ll understand everything.
You’ll learn about the tear-off process, underlayment installation, and the importance of shingles.
We’ll also let you in on what to expect in post-installation cleanup.
Let’s get you up to speed with the roof installation process, ensuring you’re well-informed every step of the way.
Evaluating Your Current Roof Condition
You’ll need a thorough roof inspection to accurately evaluate your current roof condition. Don’t underestimate this step; it’s crucial in determining the right course of action.
A professional roofer will check for visible signs of wear and tear, such as broken or missing shingles, leaks, and damage to the flashing. They’ll also inspect the gutters, downspouts, and areas around vents and chimneys.
If your roof’s structure is still sound, a layer of new shingles can be installed over the old ones. However, if the damage is extensive, a complete tear-off and re-roof may be necessary.
Choosing the Right Materials
In choosing the right materials, you’ve got to consider both the durability and the aesthetic appeal of your options. Asphalt shingles, for example, are durable, cost-effective, and come in various colors. But if you’re after a more classic look, you might opt for slate or tile, though they’re pricier and require specialized installation.
In any case, the professionals will start by removing the existing roof. They will then install a drip edge, underlayment, and flashing in key areas. Next, they will lay the shingles or tiles from the bottom up, carefully nailing each one. The ridge cap covers the peak for a finished look.
It’s a complex process, so it’s crucial to hire a professional roofing service that’ll ensure everything’s done right.
Preparing for Roof Installation
Before diving into the roof installation, you’re tasked with clearing the area and securing necessary permits but don’t forget to check the weather forecast to avoid any delays. This preparation phase is crucial to ensure a smooth and efficient execution.
Here’s a four-step guide to get your roof ready for installation:
- Clear the Area: Remove any items that might get damaged during the installation process. This includes lawn furniture, potted plants, and vehicles.
- Secure Necessary Permits: Check with your local government for any required permits. It’s important to have these in place before work begins. The roofing company can help with this.
- Check Weather Forecast: Scheduling your installation during clear weather is crucial to avoid delays and potential damage.
Take the time to properly prepare. An efficient installation starts with careful planning.
Understanding the Tear-Off Process
After the initial preparations, you’re now ready to tackle the tear-off process. But remember, it’s not just about removing the old roof; it’s also a chance to inspect the underlying structure for any damage.
Roofers will start by removing the shingles, layer by layer, using a roofing shovel. They will discard them into a dumpster to maintain a clean work area.
Once the shingles are removed, they will see the roof deck. Examine it closely for any signs of rot, mold, or structural issues. If they find any, it’s crucial to repair or replace these sections before proceeding.
Lastly, they will remove the old roofing felt, leaving a bare deck. Now, they are ready to begin the installation process of your new roof. With a clean and stable foundation, you’ll ensure a longer lifespan for your roof.
Installing the Underlayment
Professional roofers will roll out the underlayment carefully and make sure it’s secured tightly to prevent any future leaks. This layer acts as a secondary barrier between your home and the elements. It’s not just about laying it down – there’s a method to it.
Here’s your four-step process:
- Start at the edge of the roof. Roll out the underlayment parallel to the eave, ensuring it hangs over slightly for optimal water runoff.
- Secure the underlayment with roofing nails or staples every few inches. It’s crucial to get this tight and right.
- Overlap each successive row by a few inches. This step guarantees there are no gaps for water to seep through.
- Finish at the peak, trimming any excess.
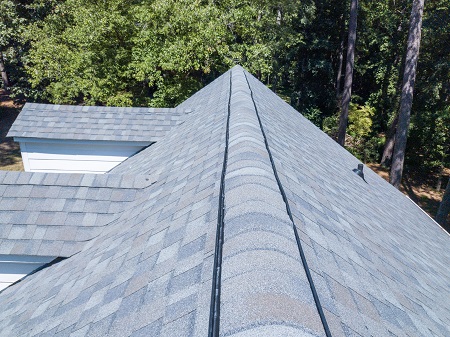
Role of Shingles in Roof Installation
You can’t underestimate the role of shingles in roof installation as they’re the first line of defense against weather elements. Carefully chosen, they’ll increase your home’s curb appeal and longevity.
First, choose the right type of shingles—be it asphalt, wooden, or metal—for your climate and aesthetic preference.
Next, they will start the installation from the bottom edge of the roof and work their way upwards. This method ensures that each layer overlaps the one below, creating a watertight barrier.
What to Expect in Post-Installation Cleanup
Expecting a meticulous post-installation cleanup is crucial, but it’s equally important to prepare for any unexpected mess. After your new roof is installed, here’s what you should anticipate:
- Removal of Debris: Your roofing contractor should haul away all old roofing materials and clean up any stray nails or granules.
- Inspection of Surrounding Area: They’ll inspect your property to ensure there’s no damage or leftover debris, focusing on your garden, driveway, and walkways.
- Final Roof Inspection: They’ll conduct a final roof inspection to confirm proper installation and to ensure no debris or tools are left behind.
- Follow-up Consultation: Expect a follow-up consultation to address any of your concerns and to ensure your satisfaction with the job.
Precision Roofing & Gutters Will Be By Your Side Every Step of the Way in the Roof Installation Process
While you might feel overwhelmed by the roof installation process, don’t worry because Precision Roofing & Gutters will guide you through every step.
Our expert roofers will start by providing an accurate estimate of the cost and completion time.
Then, we will source high-quality, locally manufactured materials, like durable synthetic felts and algae-stain-resistant shingles from Malarkey roofing products or customizable options from CertainTeed’s Integrity Roof System.
We will nail in these brand-new shingles with quality workmanship, ensuring a durable structure.
If we spot any defective or missing shingles during their comprehensive roof inspection, we will replace them promptly.
Precision Roofing & Gutters also offers regular maintenance services to keep your new roof in top condition.
Trust our experienced team for a stress-free, efficient, and cost-effective roof installation process.
Contact us for excellent customer service.
Quality roofing services we provide:
- Roof Replacement Services
- Roof Repair Services
- Gutter Installation
Visit our Testimonials page to see what our customers have to say about our roofing company.